Moving a tenant out of their unit(s) is a simple, step-by-step process:
2. Verifying Account Balances and Unit Conditions
4. Payment
5. Confirmation
6. Retaining security deposits
Beginning a move-out
You can begin a tenant move-out from a number of locations:
- From the Nav Bar, by clicking the … and selecting Move-Out.

- From the tenant’s general page, by clicking Move-Out under the Rentals section.
- From the unit’s general page, by clicking Move-Out under the General Information section.

When beginning a move-out from the Nav Bar
- After clicking the …, a dropdown menu will appear.
- Click Move-Out. The Move-Out popup screen will appear.

- Begin typing the name of the tenant or the unit you wish to process in the Tenant or unit field. Select the desired tenant or unit from the list that appears.
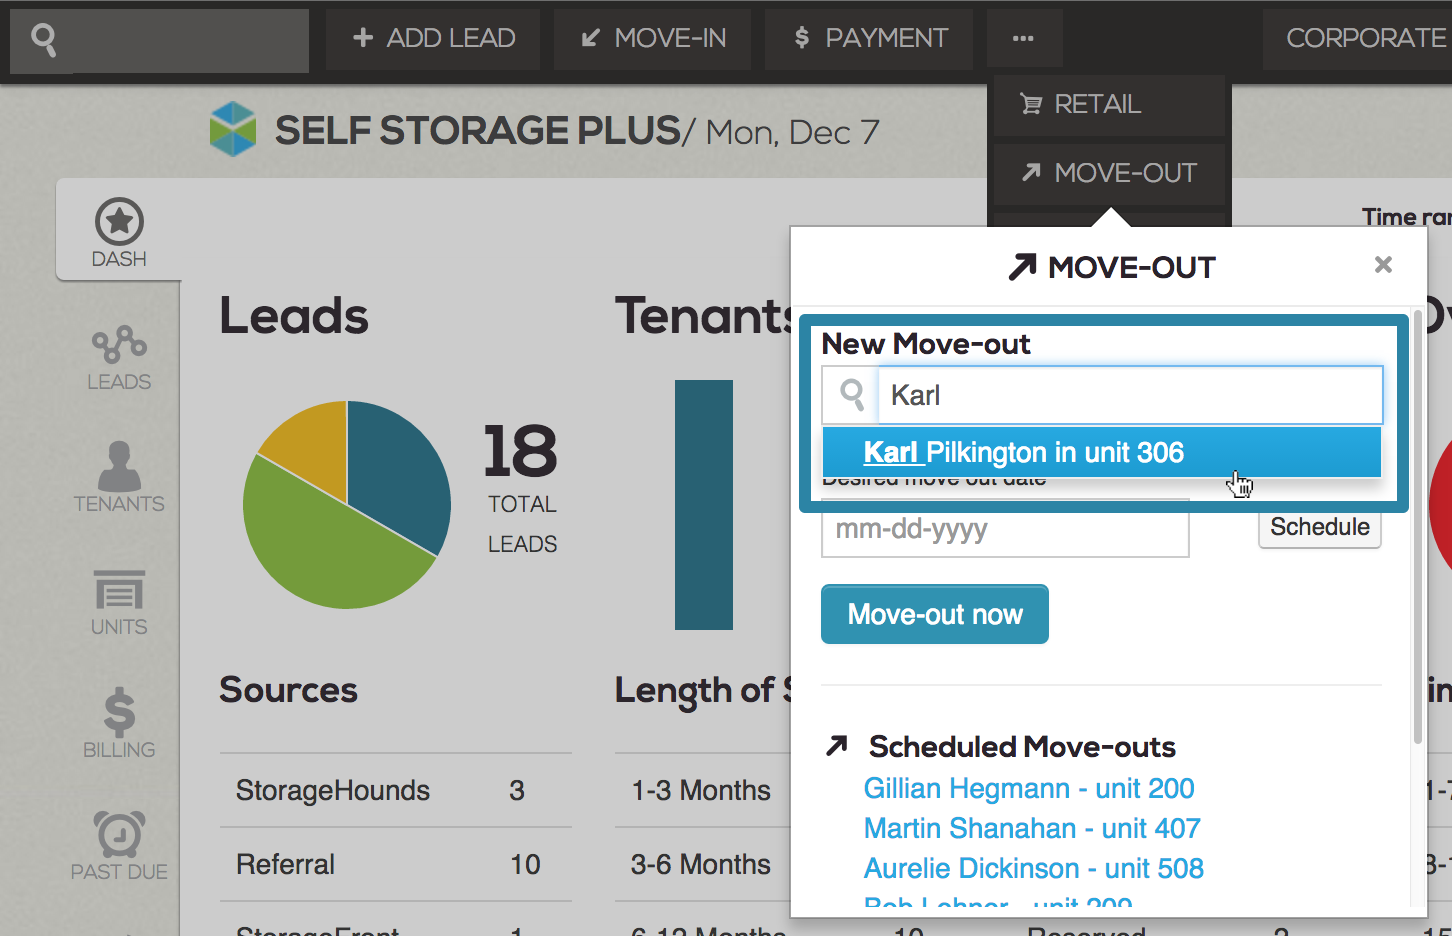
- Choose the desired move-out date by clicking in the Desired move-out date field and choosing the date from the calendar that appears.

- Click the Move-out now button to bring up the Move-Out screen.

Note that the names of previously scheduled move-outs will appear in blue at the bottom of the move-out popup screen. Clicking the desired tenant’s name from this list will also bring up the move-out screen.
When beginning a move out from the tenant or unit page
After clicking Move-Out, the move-out popup screen will appear. The tenant's name and unit will be populated in the New Move-out field.

Select a Move out reason from the dropdown menu.
📖 You can add custom move-out reasons to your software in your Corporate software settings. Learn more in our article: Move out and lead close reasons.
If the tenant is renting more than one unit, ensure you have selected the correct unit for move out. You can change the unit from the dropdown menu if needed.
Click the blue Move-out now button to process the move out now.
To schedule a move out for a future date, click Schedule. Choose the desired move out date by clicking in the Desired move out date field and choosing the date from the calendar that appears.
Verifying account balances and unit conditions
The following steps are universal, no matter where the move-out originates.
The first section of the move-out process is called the Review stage:
Backdating Move Outs
At the top of the screen, underneath the tenant’s name, you’ll see that the Desired move-out date has been set for the move-out date selected in the previous step.
- You can backdate the move-out by clicking in the date field and choosing a previous date in the calendar that appears. When backdating a move out, any charges created after the move out date will be automatically removed.
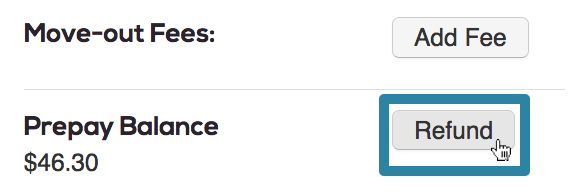
Adding Move Out Fees
- Clicking Add Fee beside Move-out Fees will allow you to add a move-out fee. A popup window will appear.
- Fill in the Amount and Reason fields.
- Click the blue Apply button. The tenant’s balance at move out will be updated.
Refunding Prepayments or Security Deposits
- If the tenant has a prepay balance or a security deposit, you’ll have the option to refund it by clicking on the Refund button beside those items.
- If the tenant owes money and you'd like to apply the security deposit to the balance due, click the Refund button next to the Security Deposit Balance.
Waiving Fees and Crediting Rent or Other Charges
The charges table allows you to view a line-by-line list of rent balances, fees, insurance, services, refunds, or rent-to-be-charged. You can waive fees by clicking the Waive button and you can remove or credit rent, insurance or other charges by clicking the Credit or Remove buttons. Waiving a fee during the move out will be recorded in the Fees Waived report with a source of Move Out. Crediting rent or other charges will be recorded in the Credits Issued report with a source of Move Out.
If you changed the move-out date after starting the move-out, credits or waives you previously applied will be cleared. If this happens, you will see a banner message telling you to reapply any credits or waives.
When processing a move-out, a tenant's account may be in one of several different states:
- Move-out with a Balance Due
- Move-out without a Balance Due and no Prepay Balance
- Move-out with a Prepay Balance
Below the charges table, the total for all the charges, etc. will either read Balance due at move-out or Refund owed at move-out. By looking at the line items in the table and the total due or owed at move-out, you can determine whether a tenant will be charged or will receive a refund.
At the bottom of the screen, you’ll see a dropdown that allows you to specify why a tenant is leaving:
- Clicking the dropdown under Reason for leaving. Choose a reason from the list of options. Clicking that option will add it to the move out record.
- At this stage, you can also schedule the unit for maintenance, cleaning, or both. Check the boxes next to the desired action(s) and select the date for the action to be completed.
- You can also add a note with any pertinent information concerning the move-out. Type your note in the field provided.
- Selecting the star icon beside IMPORTANT will prioritize your note over other notes in the system.
- Click Next in the lower right to proceed to the Documentation stage of the move out.
Adding documentation
The second section of the move-out process is called the Documentation stage:
Your facility may or may not have move-out documentation, depending on your settings:
- Under Documentation, confirm the documents you wish to attach to the move-out by checking the boxes next to the document title. Checking the box beside Select All will select all of the documents available.
- Unattach items by unchecking the box next to the desired item.
- Clicking Print Selected will allow you to print the selected documents for the tenant.
Payment
The third section of the move-out process is called the Payment or Refund stage.

At the top of the screen, you’ll see the balance due in red, followed by the payment amount.
Processing a Refund
If a refund balance is owed to the tenant at move-out, you can process the refund on this screen.
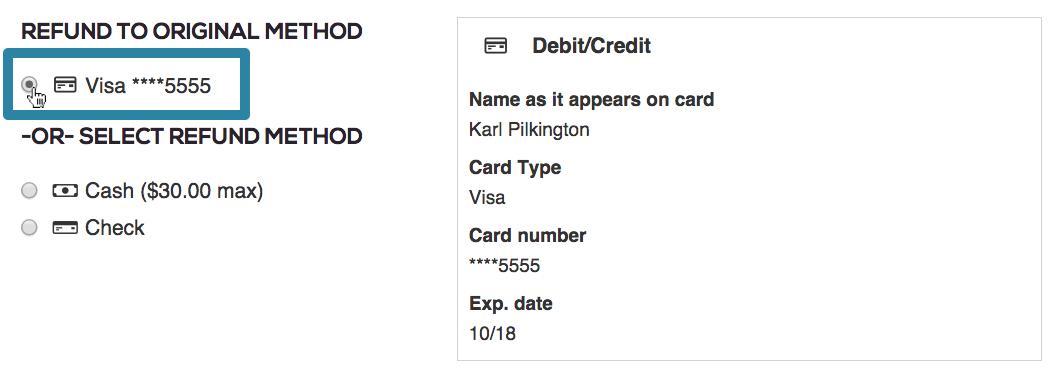
You can refund the tenant in three ways:
- Refund to Original Method
- Cash
- Check
- Select the method by clicking the button next to the method.
- A reason for refund is required if a refund is given. Type your note in the field.
- Selecting the star icon beside IMPORTANT will prioritize your note over other notes in the system.
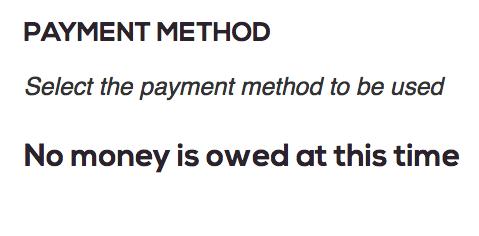
Moving out with a Zero Balance
If the tenant does not owe an amount or is not due a refund, you’ll see a message noting that no money is owed.
Processing a Payment
If the tenant owes a balance upon move-out, you’ll see the standard payment screen where you will be prompted to take a payment or have the option to pay later.
Select the payment method and click the Process Payment button to process the transaction and proceed to the confirmation stage of the move-out.
Moving a Tenant Out with a Balance
If you are moving a tenant out who has failed to pay, click the Pay Later button. This will complete the move out, opening the unit to be rented by another tenant, but leave the balance due open on the account. The confirmation screen will appear and you'll have the option to write-off their account balance. Visit the Writing Off Bad Debt support article to learn more.
Confirmation
The fourth and final section of the move-out process is called the confirmation stage. A message will appear confirming the move-out has been successful and that your payment or refund has been processed:

You will also see a table listing, line-by-line, the charges or refunds and their totals.
From this screen, you can print the receipt or any attached documentation for the tenant or choose to email it to them:
- Click Print beside Receipt to print the receipt for the tenant.
- Fill out the field labeled Email address and click Email to send the tenant the receipt via email.
- Check the box next to Update email address to save the email to the tenant’s profile.
Under Documentation, you can choose to print or email the documents attached to the move-out:
When you are finished, click Close in the lower right to finalize the move-out and finish the process. If the tenant has a remaining balance and wishes to pay the amount, click Process Remaining Balance.
If the tenant has a remaining balance and you'd like to close those invoices and write off the balances to bad debt, click the Write off Bad Debt button. If you choose to try to continue to collect the amount due, you can close the confirmation screen. The Write Off Bad Debt button will be available on the tenant's ledger for you to write off the debt at a later time.
Retaining security deposits
If you did not refund a tenant's security deposit at move-out and you'd like to retain it as income, you can do so from the tenant's ledger. Retaining security deposits helps you keep better track of where your facility's non-rent income is coming from. Taking the action to retain a security deposit will assign it to the Other Income account code and will remove it as a liability.
To retain a non-refunded security deposit after move-out, find the security deposit line item on the tenant's ledger and click the arrow to the right. Click Retain Deposit.
A confirmation window will open letting you know how the retained security deposit will be recognized by your software's accounting system as income rather than a liability. Note that once you've retained the security deposit, it cannot be undone. To move forward, click Continue.
You'll receive a confirmation that the security deposit has been retained as Other Income.