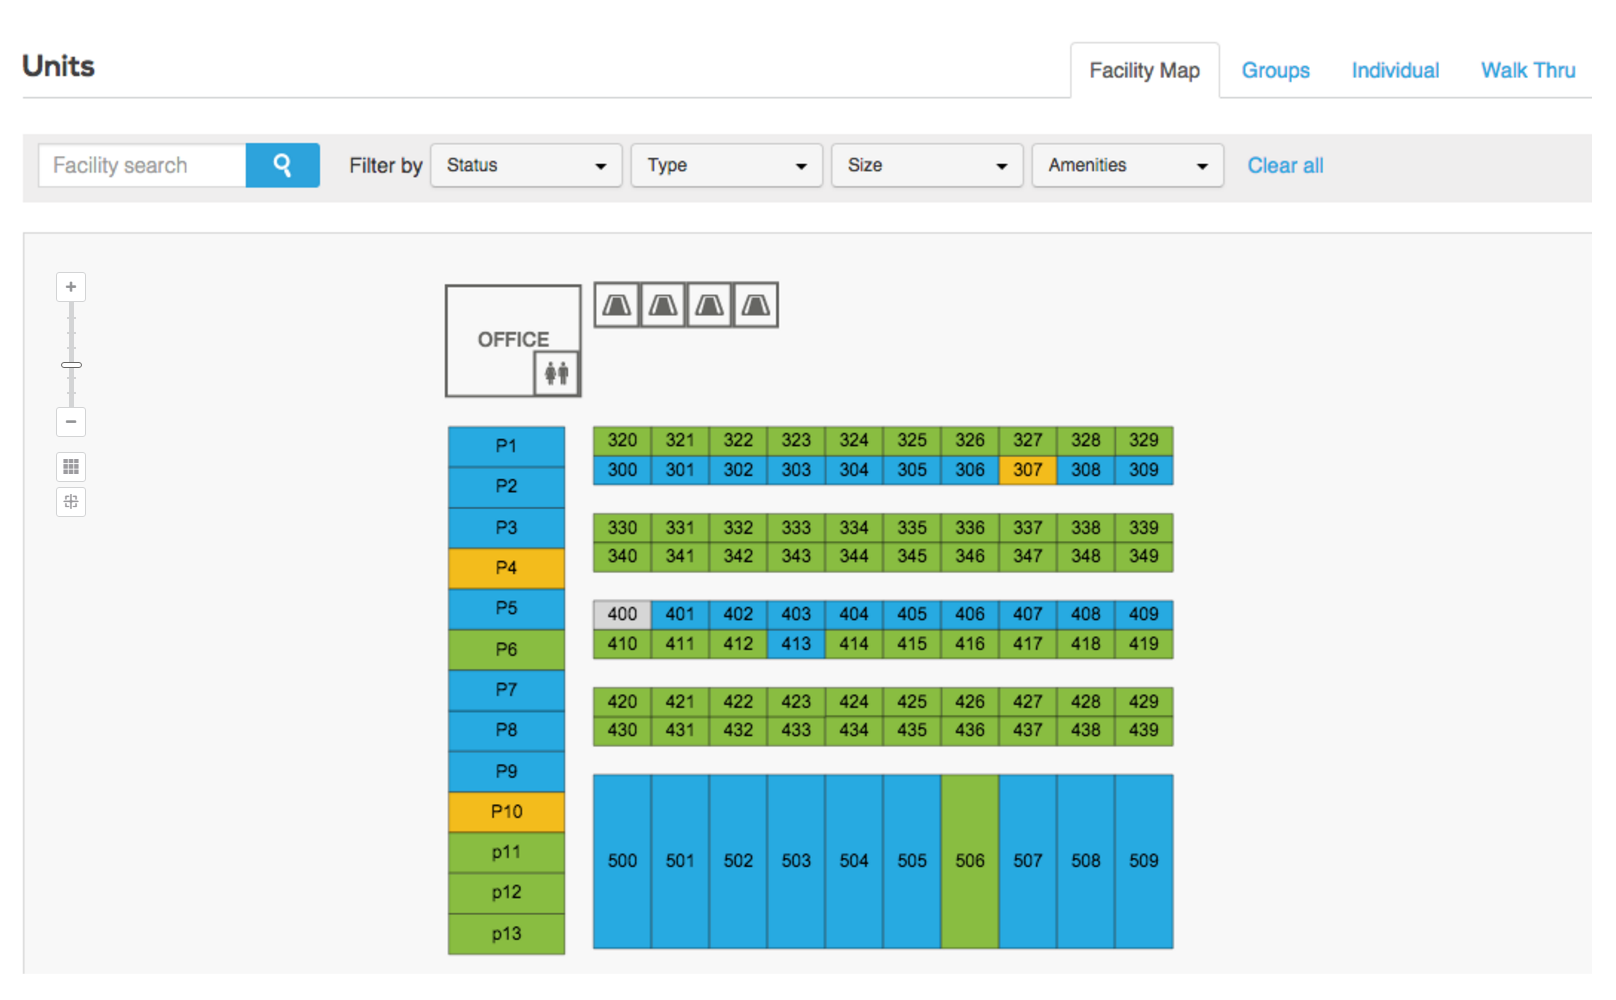
How to Use the Facility Map Manager
After you’ve built your facility map, you can use it to view unit status, track leads, and complete move-ins, move-outs, and transfers. The map displays the status of each of your units: occupied, unoccupied, reserved, delinquent, and unrentable.
How to Access the Facility Map Manager
-
Click the units tab on the left side of the screen.
-
In the upper right hand corner of the units page, click the facility map tab.

Understanding Your Facility Map
When you navigate to the facility map manager, you will see the map you created in the facility map builder. The map displays the status of each of your units: blue (occupied), green (unoccupied), yellow (reserved), red (delinquent), and grey (unrentable).
You will also see symbols indicating objects such as your office, the parking lot, fire hydrants, the property gate, and any other items you added to the map in the builder.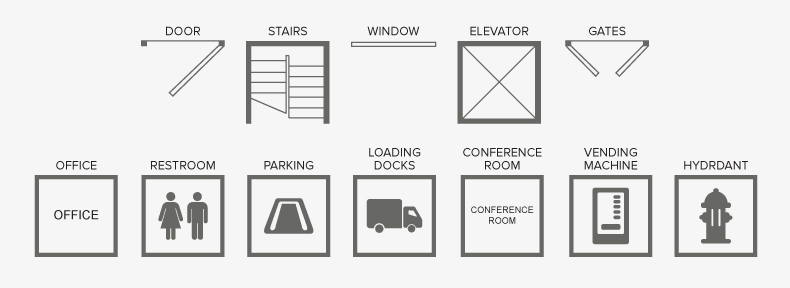
How to Use the Manager to Track Unit Activity
Hover over any unit to view the unit number. Clicking on any unit will display the unit number, size, standard rate, managed rate, and amenities. You can also click on any unit to leave a note. When you click on a unit, a sidebar will appear on the right side of the screen and allow you to perform actions depending on the status of the unit.
If the unit is occupied, you can:
- View the current tenant’s name, payment status, balance, and contact information.
- Click pay now to take a payment.
- Click move-out to schedule or complete a move-out.
- Click transfer to schedule or complete a transfer to a different unit.
- Click add activity to schedule cleaning or maintenance.
If the unit is unoccupied, you can:
- Click reserve to reserve the unit for a lead.
- Click add activity to schedule cleaning or maintenance.
If the unit is reserved, you can:
- Click move-in to complete a move-in.
- Click add activity to schedule cleaning or maintenance.
- Click complete transfer to complete a scheduled transfer into the unit.
- Click the x next to complete transfer to cancel a scheduled transfer.
Navigation: Left Side of the Map
On the left side of the map, you have several options for navigation:
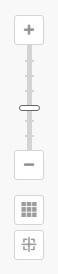
- Press the + and - buttons to zoom in and out. You can also zoom out by clicking a point on the bar and by moving the slider.
- Click on the grid tool (grid icon) to view your facility map on a grid. Click on the grid icon again to remove the grid.
- Click on the center tool (crosshair icon) to return to the center of the map.
If you created multiple floors for your facility map in the builder:
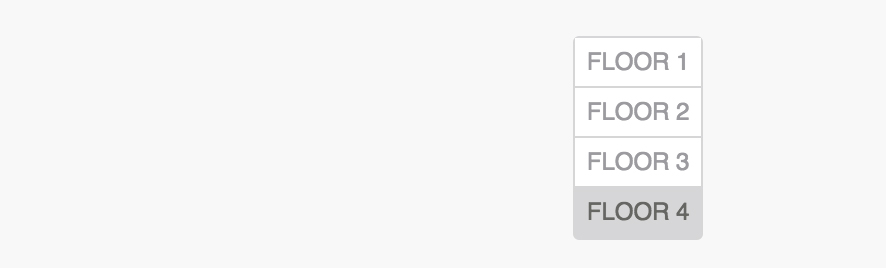
- You will see a list of numbers on the right side of the screen. These correspond to the numbers you created in the builder.
- You can click on a floor number to view the map for that floor.
Filters: Top Left of the Map
Along the top of the map, you have several options to search for units and filter your facility map:

- Click the facility search bar to search for a specific unit number. The map will highlight and zoom in on the unit you searched for. Delete your search and click the magnifying glass to return to a standard view of your map.
- Use the dropdown menus to filter units by status, type, size, amenities, and scheduled move-out. Check all the items you wish to search for and click apply when you’re ready to search. Click check all to select all items in the dropdown or clear all to remove your selection. You can select multiple filters from multiple menus. You can also click clear all to the right of the dropdown menus, which will clear your entire selection.
Printing the Facility Map
In the upper right of the Units tab, you will see a print icon. Clicking on that icon will give you two options: (1) Print Statuses and (2) Print Blank. Print Statuses is for your internal use. It will provide a color coded PDF document of your facility indicating which units are delinquent (red), vacant (green), occupied (blue), reserved (yellow) or unrentable (gray). Print Blank provides a black and white version of the map which you can print for your tenants.

Facility Map - Print Statuses

Facility Map - Print Blank
![]()
Facility Map as Move In Document
Not only can you print the facility map from the Units tab, when you move in a new tenant, the facility map document will be available for printing during the move in process. This version of the facility map printout will be black and white except for the unit the tenant is renting. That unit will be highlighted on the map printout to allow the tenant to quickly see where his/her unit is on the property. The tenant's gate code will be displayed in the upper right of the printout.
The "Facility Map" document will be automatically created and activated for use during the move in process when a map has been created and published through the Map Builder. Going to Settings > Documents and Emails and clicking the Off button will deactivate the "Facility Map" document or clicking the Edit button will allow you to change what is displayed in the header of the map.
