Documents, images, and webcam snapshots can be captured and stored on a tenant profile from a number of places in your software:
- Upload files at move-in
- Upload files from a tenant profile
- Capture webcam images from a tenant profile
- View and delete uploaded files
- Designate a primary image from a tenant profile
Uploading Files at Move-In
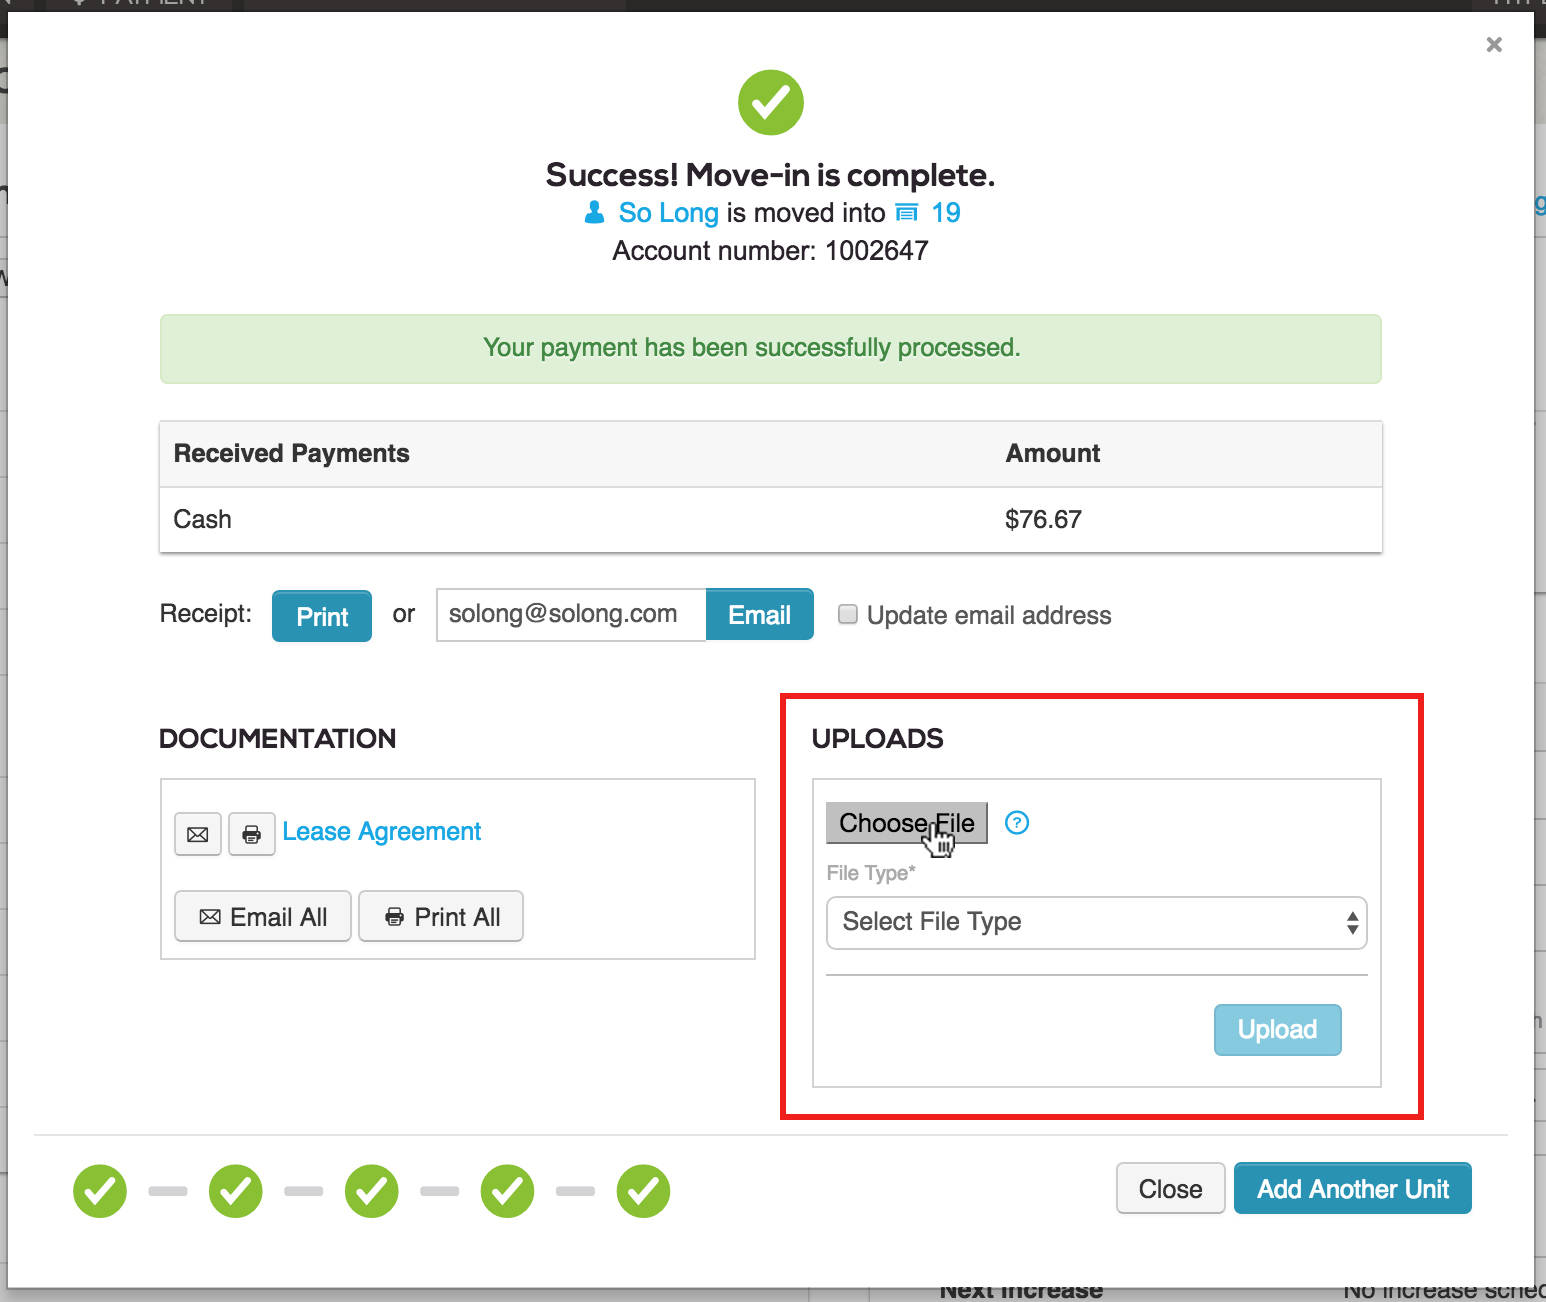
You may upload an image or a pdf document saved on your computer during the last step of the move-in process:
- Begin a normal Move-in.
- Complete the move-in, as usual, and proceed to the final Success screen.
- In the bottom right corner, locate the Uploads section.
- Select Choose File to open your computer's file browser.

- Locate the image or pdf file you wish to store in this tenant's records and press. Acceptable file types are pdf, jpeg, tif, png - 10MB max.
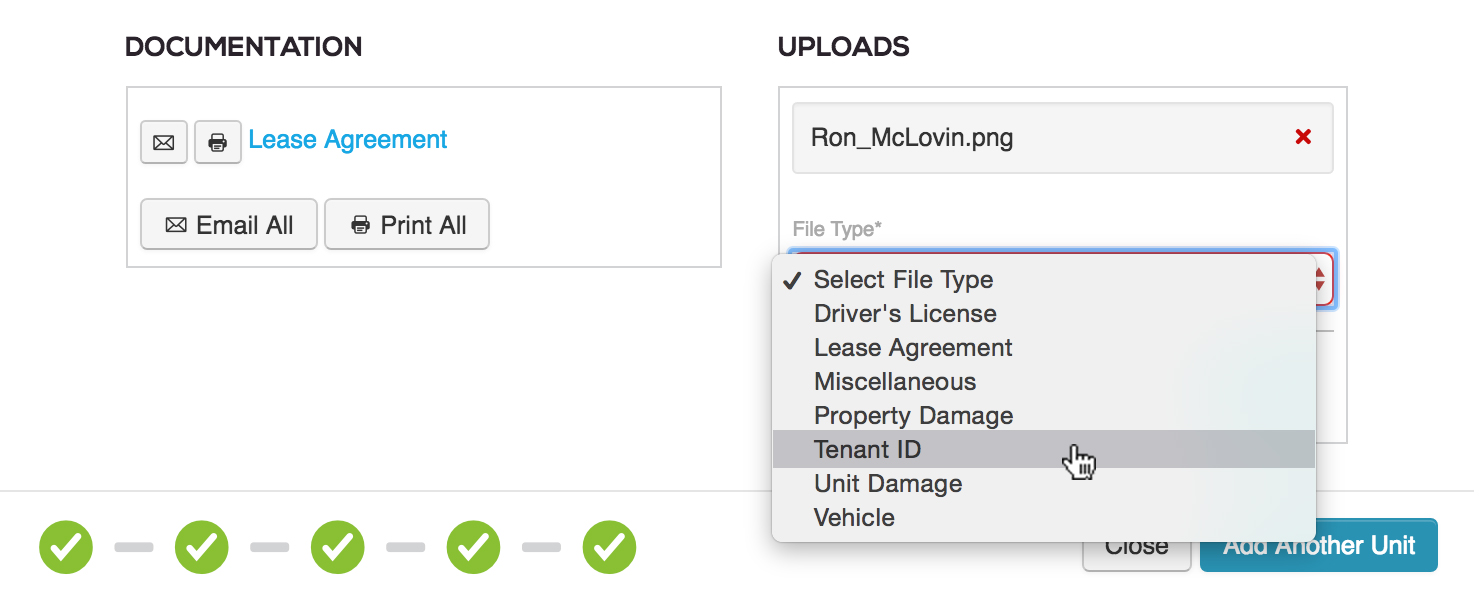
- Click the Select File Type dropdown to designate a file type: Driver’s License, Lease Agreement, Miscellaneous, Property Damage, Tenant ID, Unit Damage, Vehicle.

- Click Upload.
- If you wish to add more files, select Choose File and repeat the steps again.
- All uploaded files can be viewed in the Documents tab of the tenant's profile.
Uploading files from a tenant profile
You may upload an image or a pdf document saved on your computer to a tenant profile at any time:
- To access a tenant profile, enter the tenant's name in the top left search bar, or, click the tenant's name from anywhere in the system.
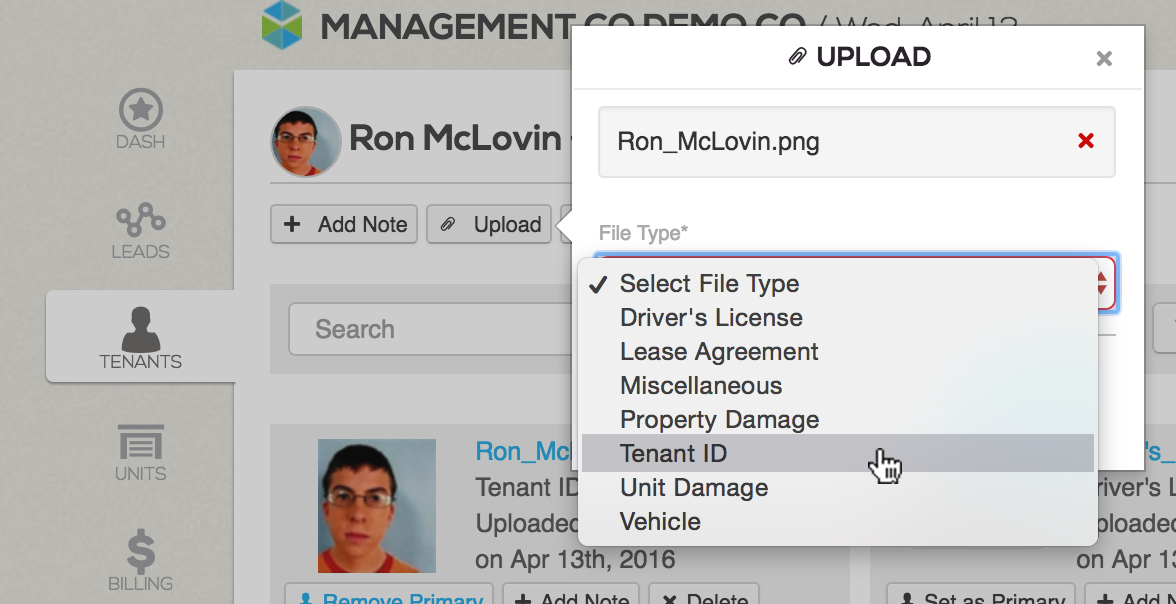
- Click the Upload button in the top left under the tenant's name.
- Select Choose File to open your computer's file browser.

- Locate the image or file (pdf, jpeg, tif, or PNG - 10MB max) you wish to store in this tenant's records and press.
- Click the Select File Type dropdown to designate a file type: Driver’s License, Lease Agreement, Miscellaneous, Property Damage, Tenant ID, Unit Damage, Vehicle.

- Click Upload.
- Once the upload is complete, you will get a confirmation message. Click the Documents text link to view the newly uploaded file in your Documents tab.

- All uploaded files can be viewed in the Documents tab of the tenant's profile.
Capturing webcam images from a tenant profile
You may capture an image via any Window's tablet or device with a webcam from a tenant profile at any time:
- To access a tenant profile, enter the tenant's name in the top left search bar, or, click the tenant's name from anywhere in the system.
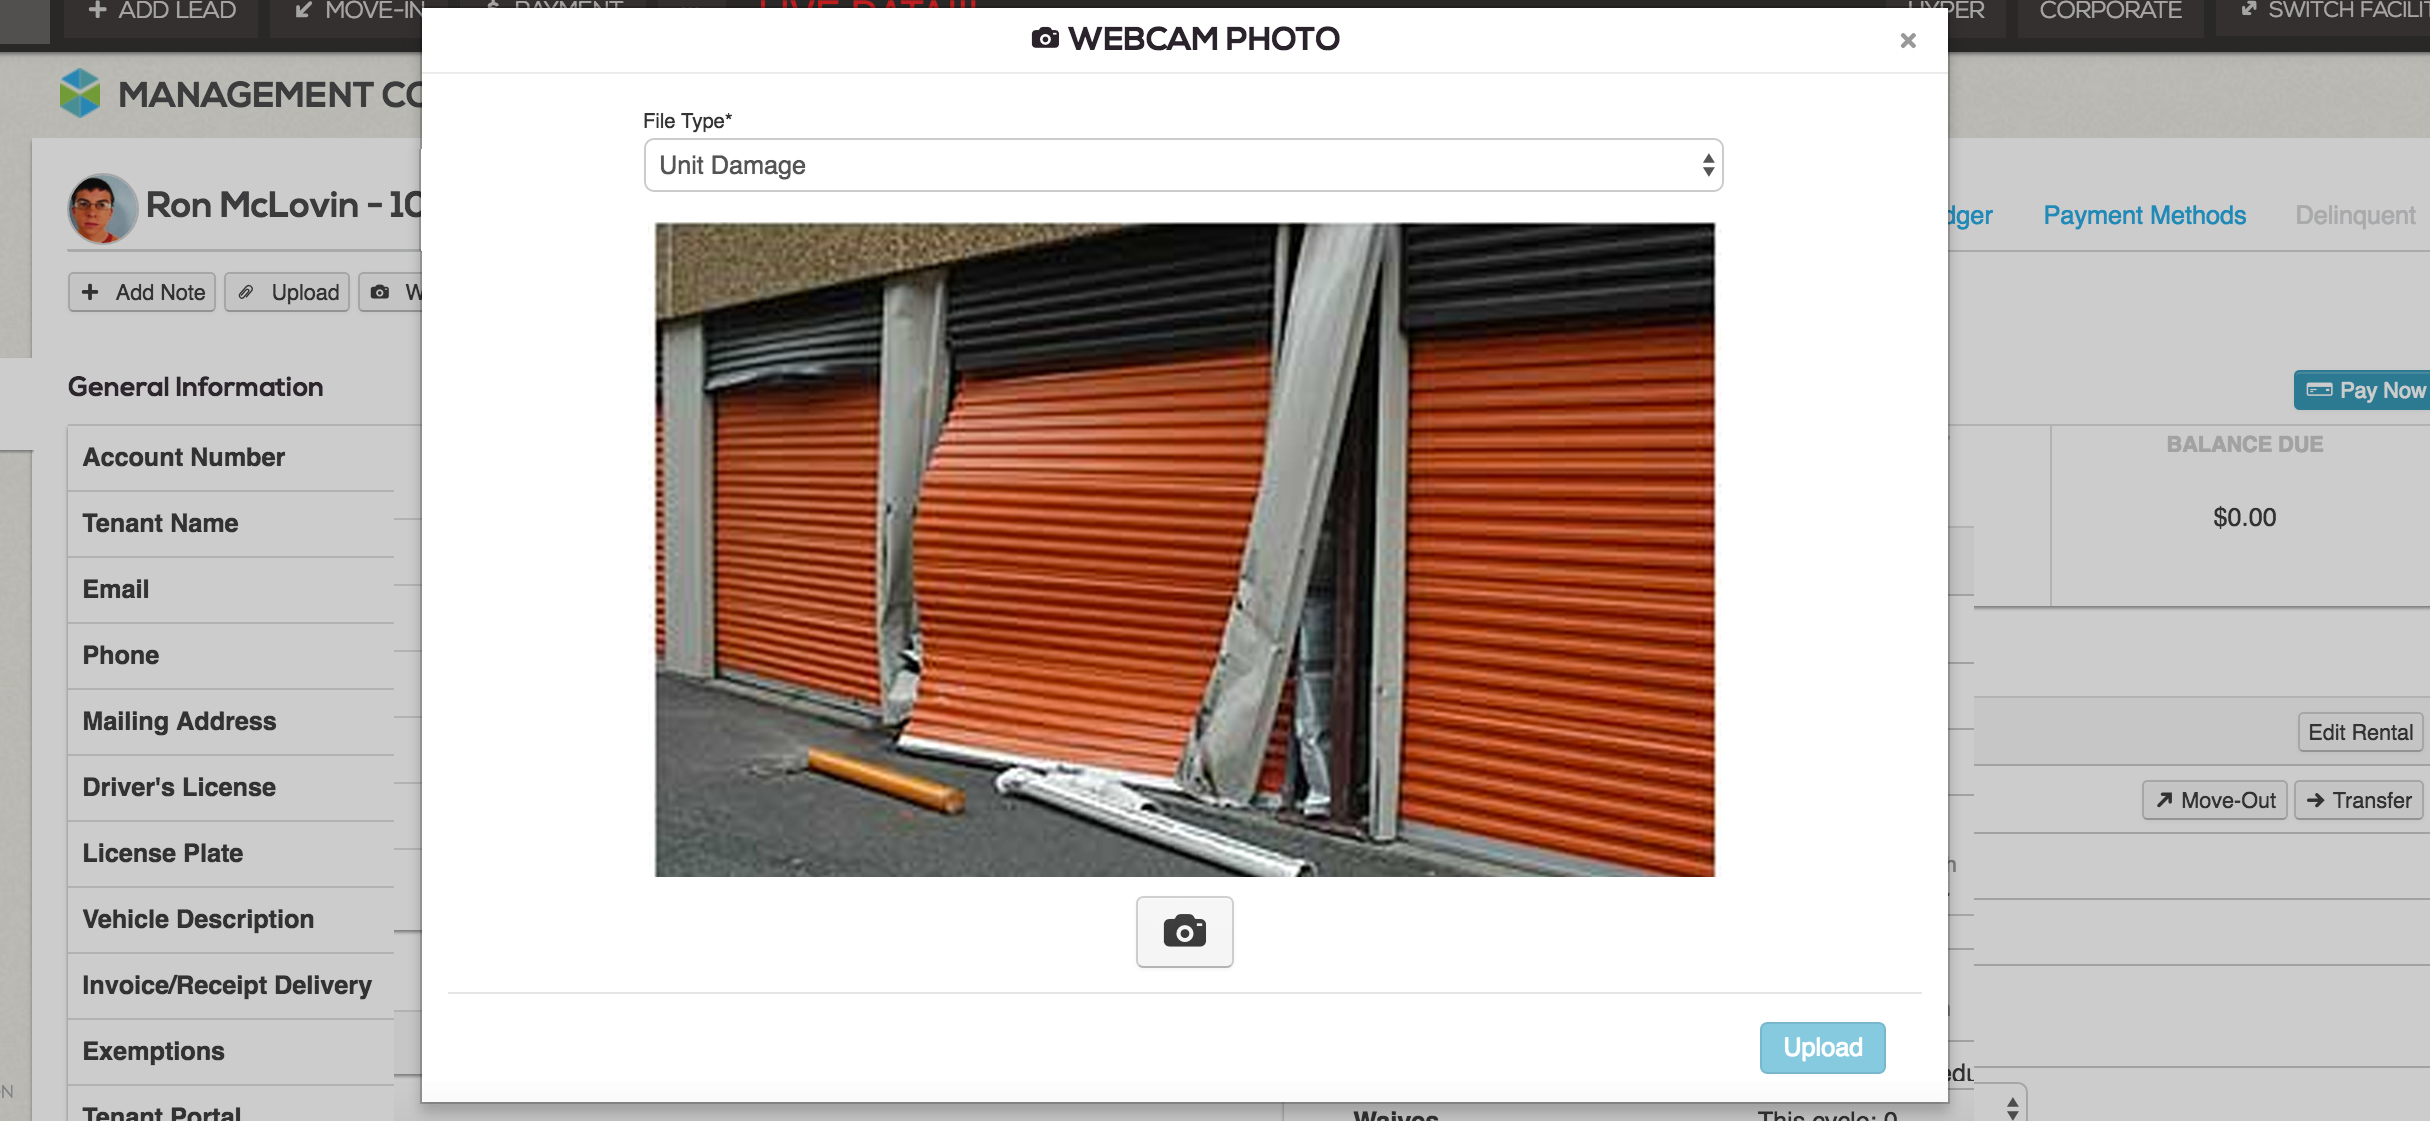
- Click the Webcam Photo button in the top left under the tenant's name.

- Click the Select File Type dropdown to designate a file type: Driver’s License, Lease Agreement, Miscellaneous, Property Damage, Tenant ID, Unit Damage, Vehicle.
- Frame the image you would like to capture in the preview window and then press the camera button to snap the picture.

- When you're happy with the image you've captured, click the Upload button.
- Once the upload is complete, you will get a confirmation message. Click the Documents text link to view the newly uploaded file in your Documents tab.
- All uploaded files can be viewed in the "Documents" tab of the tenant's profile.
View and Delete Uploaded Files
All images are viewable and removable from the tenant's profile.
- To access a tenant profile, enter the tenant's name in the top left search bar, or, click the tenant's name from anywhere in the system.
- Click the Documents tab found along the top right of their profile.

- All uploaded files will be displayed just below the gray search and filter bar.
- From the file preview, you can select a primary image, add a note, delete the file, or click the blue filename text link to view or print a larger version. Simply click the Set as Primary, Add Note, and Delete buttons.

Designating a primary image from a tenant profile
You may set a primary image from a tenant profile at any time to display a profile picture in the top left corner of the tenant's profile next to their name:
- To access a tenant profile, enter the tenant's name in the top left search bar, or, click the tenant's name from anywhere in the system.
- Click the Documents tab found along the top right of their profile.
- All uploaded files will be displayed just below the gray search and filter bar.
- Click the Set as Primary button the uploaded file of your choice.

- Once the action is complete, the page will reload to display the new primary image in the top left corner near the tenant's name.
Troubleshooting tips:
If you click on the file to open it after you've uploaded to your tenant's account and the screen shows strange characters instead of the picture, the problem is the file was saved without an extension. To solve this, go to the picture in file on your computer where you originally saved it. Click save as and add the .jpg or .png file extension to the end of the file name.