There are a variety of ways to handle refunds at move-out based on the Refund Settings you have configured. This article will outline the process for:
Issuing a refund at move-out
If a tenant has a paid balance and is due a refund during move-out, the software will prompt you to refund the tenant. You must select Refund next to Prepay Balance to request a refund. Additionally, you can refund the tenant for their security deposit if you choose to do so.

After you've selected Refund, the table that outlines your tenant's balance will expand, and you can choose which parts of the prepaid balance you'd like to refund. For instance, if you want to deny part of the refund, select Remove next to the line item you don't want to refund. Once you've made any changes to the refund, select Next to continue the move-out process. You'll go through the documents stage of move-out before reaching your final steps of issuing your refund.

The Refund stage of move-out prompts you to select a refund method and issue the refund:
- Select the refund method by choosing Cash or Check. Alternatively, if the tenant has a card on file, you can refund the card by choosing Refund to Original Method. You also have the option to select Deny Refund at this point in the process.
- Enter a reason for the refund. This field is required.
- Enter an address or use the mailing address you have on file to which the refund check will be sent. If you've chosen Cash for your refund or are choosing the refund the tenant's card, you won't need to enter an address.
- Click Issue Refund to issue the refund and complete the move-out. You'll see a confirmation that the refund has been processed with details about what has been refunded.
The tenant's ledger will reflect the refund:
- If you chose to refund the tenant's card on file, the refund will be automatically processed to their card, and the tenant's ledger will reflect the refund.

- If you've issued a cash refund, the tenant ledger will reflect the cash refund.

- If you've issued a check refund, the tenant ledger will reflect that the refund check was issued.

You can choose to require approval for refunds by defining which roles within your software are permitted to do so. To learn more about the refund request and approval process, read on.
Requesting a refund
If your facility requires approval for refunds, follow the same steps that you normally complete during move-out. The move-out process is the same until the third step of move-out, which prompts you to Request Refund Approval rather than issue the refund.

Once you've requested refund approval, the move-out is complete.
The tenant's record will reflect that a refund is pending on their History tab.

Approving a Refund
If you've adjusted your Refund Settings to send refund notification emails when a refund needs approval, an email will be sent to the designated address you've entered. This email includes a button that will take the user right to the refund approval screen, which can also be found in the Corporate section under Tasks.

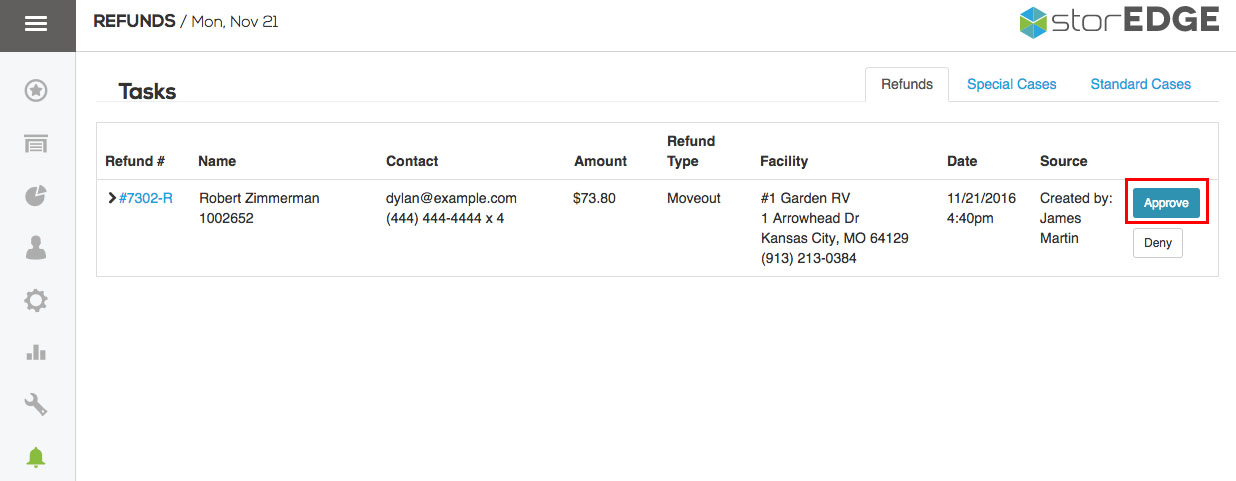
Here, you will see all of your refund approval requests, and you can choose to approve or deny the refund. To approve the refund, simply click Approve.

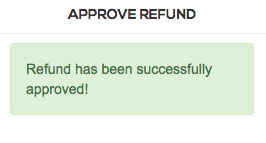
Your software will ask you again if you're sure you want to approve the refund. To approve it, select Continue. Your software will give you a confirmation that the refund has successfully been approved.


All approved refunds payable by check will be listed in the Refund Checks report in the Corporate section of your software. To run a check refunds report, access the Reports tab in the Corporate section. Under Financial, you'll find Refund Checks. Define the dates you'd like for your report, and select Generate Report.

Denying a refund
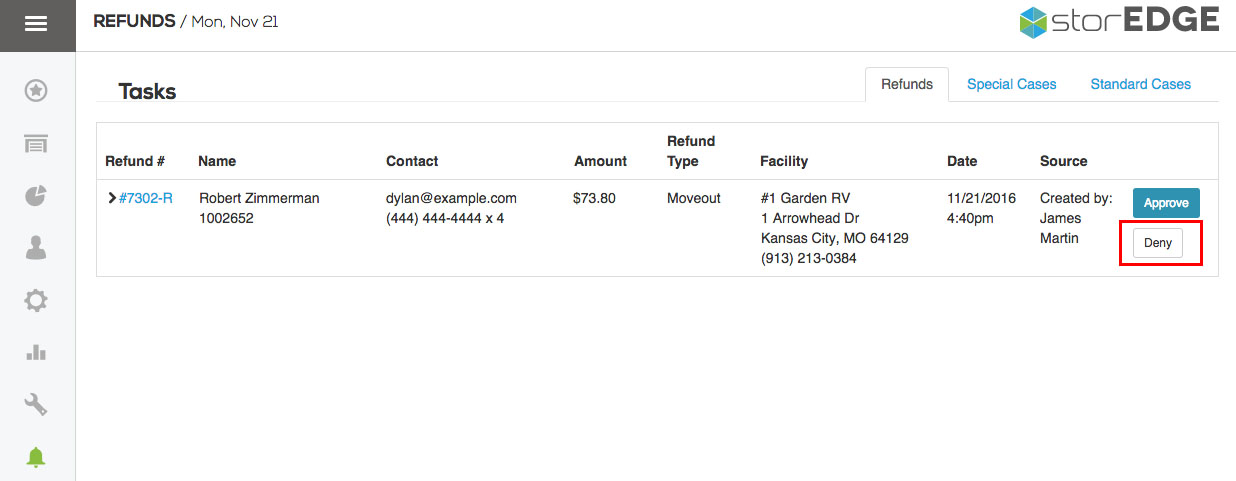
To deny a refund, simply select Deny in the Tasks tab of the Corporate section. You can also use the button in your notification email to reach this section.

Your software will ask you again if you're sure you want to deny the refund, and will prompt you to enter a reason why you're choosing to deny the refund. Entering something into this field is required. After clicking Continue, you'll see a notification that the refund has successfully been denied.

When you've denied a refund, the denial will be reflected in the tenant's file, but no changes will be made to the tenant ledger, as money has not changed hands.

Requiring approval for refunds is an optional feature in your software. You can learn more about setting up your software to require approval for refunds by reading more about Refund Settings.