Your Storable Edge software allows you to add your own design to emails through Email Layouts in the Document Editor. These layouts will determine the formatting of any new Email Templates you create.
Navigate to the Corporate section of your software. On the Software Settings tab, click Emails under the Documents heading. Then, click the Layouts tab.
Default Templates
On the Email Layouts screen there is a list of default email layouts and the option to add a customized layout. The system provides default email layouts for you to use. Click Copy and Edit to customize the default layout to your brand and message. The selected email layout will open in the Document Editor where you can edit the text, add or remove replacement fields and utilize the formatting tools.
Replacement Fields
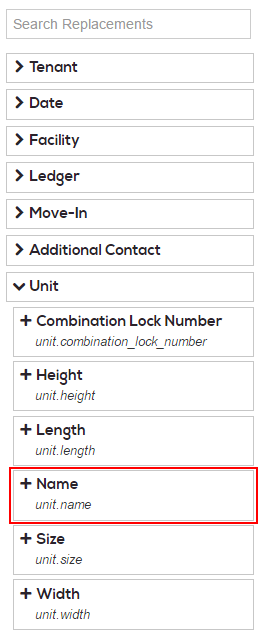
Replacement fields pull in information from the system and populate the email body with specific information. These fields function as markers for information pertinent to the recipient of the email and are automatically replaced with that information at the time of the selected action or event. For example, an overdue email message can be added to the delinquency process. If you place the replacement field of [[unit.name]] in the overdue email message, then the unit number the tenant rents will appear in the email message.
Replacement fields are organized into a table on the Document Editor page. This table is divided into several categories. Clicking the expansion arrow beside each category will expand that section and show you all of the available replacement fields in that category.

To place a replacement field in an email template:
- Locate the desired replacement field in the categorized list
- Place the cursor in the editing window in the place you wish to add the field
- Click the replacement field (denoted by a + next to the name of the field, such as + Name)
The replacement field will be automatically formatted and added to the email template.
To remove an unwanted replacement field, simply delete it from the text or click Undo at the top of the editing window.
Customized Layouts
To create a new email layout in the Document Editor:
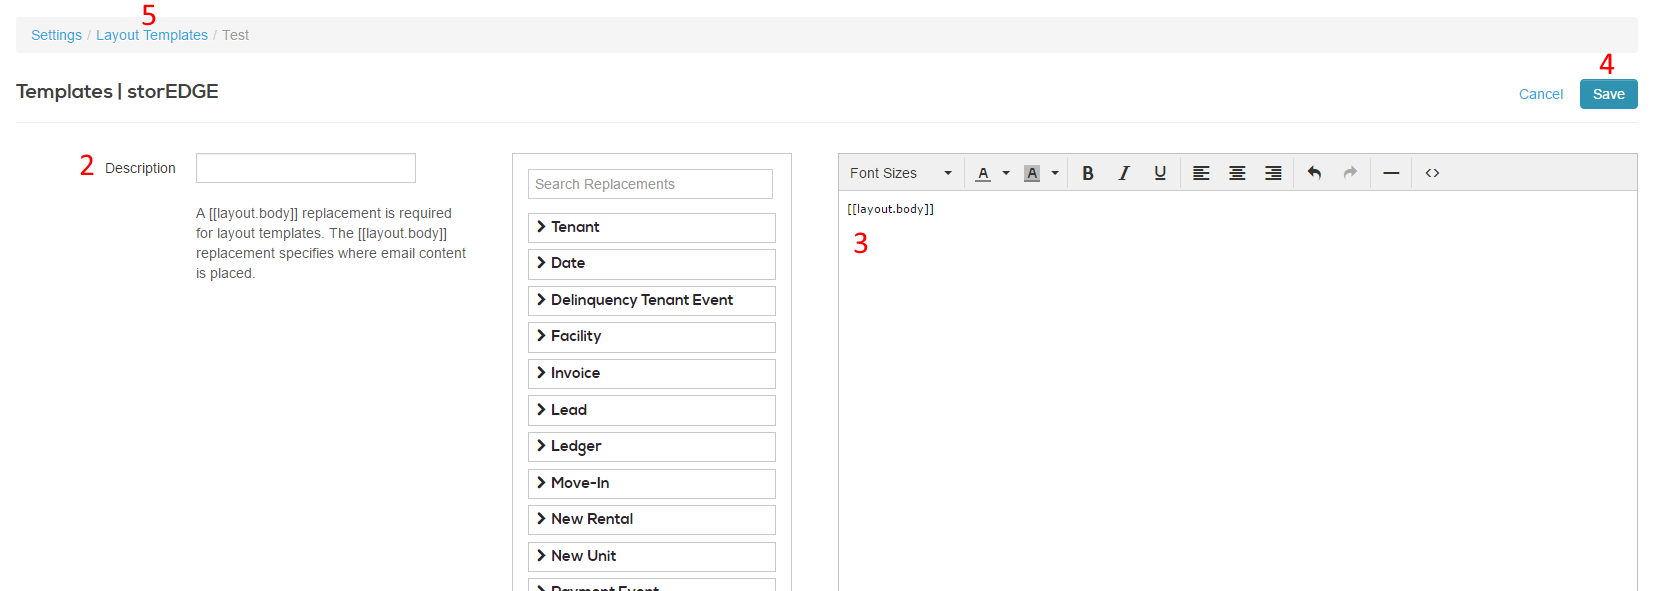
- Click + Add new template. The Document Editor will open with a new, blank layout.
- Enter a title for the email message in the Description field.
- Begin designing your layout and typing your email message into the editor box.
- Utilize the formatting tools at the top of the editor box to make common styling choices.
- Advanced users can utilize the <>Source Code tool to add HTML code to their layout.
- Add replacement fields as needed.
4. Once you are satisfied with your email layout, click the Save button.
5. Click the Layout Templates link in the upper left corner to go back to the list of templates.
6. Click on the Email tab. Click Edit on an email template and select your Layout Template from the dropdown list. Save your changes.

Apply layouts to two-way email
You can apply layouts to your two-way email by navigating back to the Software Settings tab and selecting Settings under the Documents heading. Click the radio button next to Yes under Enable Two-Way Email Layouts. Select the email layout you’d like to use from the dropdown menu, and select the facilities for which you’d like to use the layout before saving your changes.
Click Save when you are done.