Many potential renters don't know what they want or what kind of commitment they are willing to make at the beginning of a call or visit. Some have the intention of renting right away. Some are just shopping around for availability and pricing. Others are looking to make a commitment to rent in the future but aren't ready to make a decision today. Storable Edge Facility Management Software allows you to start gathering the potential renter's information right away without forcing you to classify them as either a Lead, Reservation or Move-In. Then, as your conversation continues with the potential renter, you can continue along through the process and decide to either stop and save the information as a lead, reserve a particular unit for them, or move them in...all in one place. Here's how:
1. Begin Gathering Information
- From the Nav Bar, click +Tenant. The Tenant dropdown will appear.
- Begin typing the tenant’s first and last name in the Tenant Name field.
- If the tenant does not exist in the system, click the Create new tenant link in the dropdown.
- Clicking on +Tenant will also reveal any existing leads, reservations or in-progress move-ins. Simply select a name from the list to add more information to the record, make changes to the record (for example, convert a lead to a reservation, or convert a reservation to a move-in), or close the record.
Next you will be brought to the information gathering screen. It is recommended that you fill in as much as you can about the tenant here, but only the first name is a required field.
TENANT INFORMATION

RENTAL INFORMATION (optional for leads)
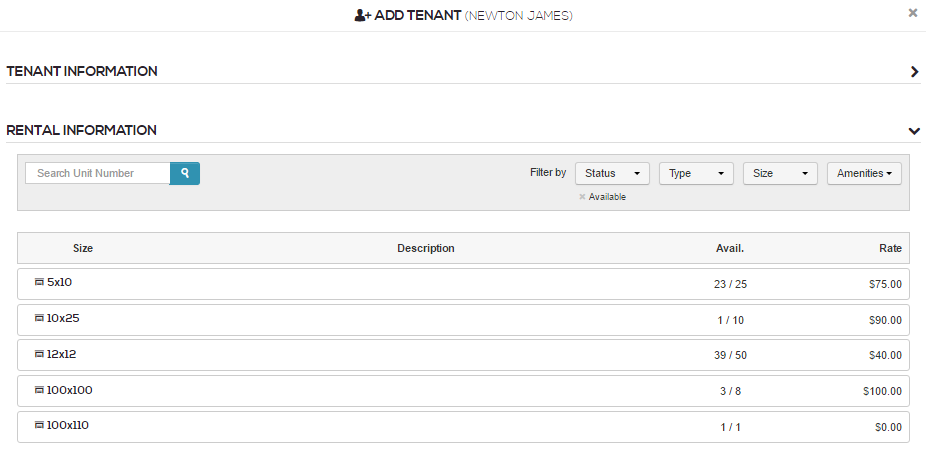
- Click on Rental Information to see your list of available unit sizes. At the top of the list there is a search box that allows you to pull up a specific unit number and filtering options where you can narrow down the list of available units by type, size or amenities.

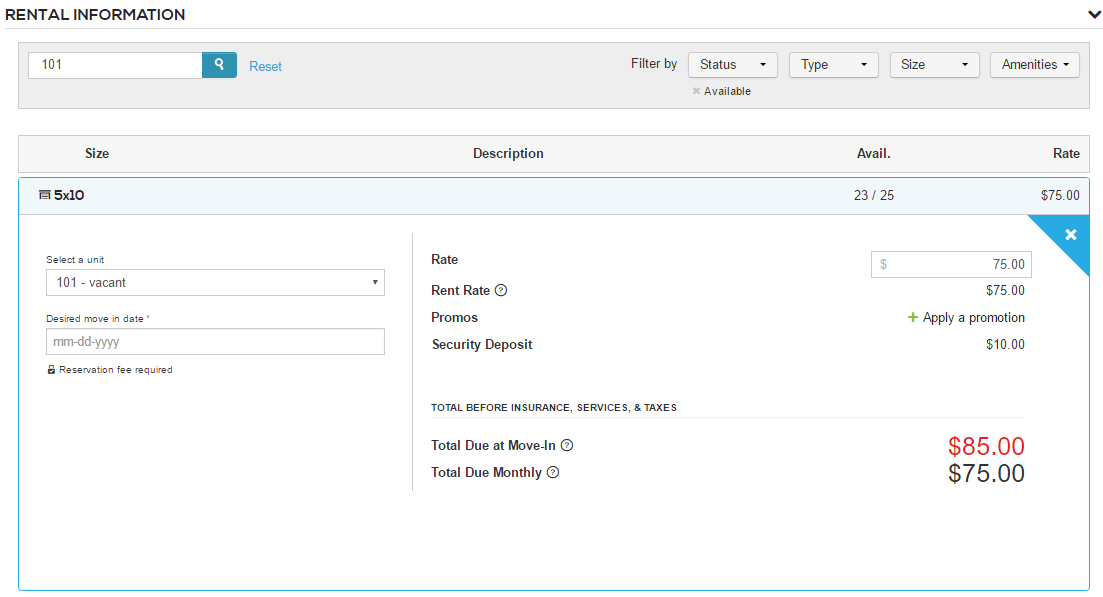
2. Enter a unit number in the search box or click on a group of units to assign a unit to the tenant. If your user permissions allow, you can then adjust the rate or add a discount/promotion.

Select the rate for the unit using the dropdown rate selection menu. Note that if there is a managed rate for the unit, it will appear as the default selection. If there is no managed rate, the rate will default to the standard rate. You can also select Custom rate and enter your own rate.
If you are making a reservation (not saving a lead), then the rate you select at this time will be saved and will populate as the default when the tenant moves in. If you’d like to change the saved rate at move-in, you can do so by using the rate selection dropdown.
If Tiered Pricing is enabled at your facility, you will see all available tiers to select.
MARKETING INFORMATION (optional)
- Click on Marketing Information to record how the tenant found your business. Select the Kind and Source from the dropdown menus provided. Kind represents the method the tenant used to find your business, and source represents the specific location. For example, selecting Internet means that the tenant found your business by searching the internet and finding your marketing website; selecting Billboard means that the tenant found your business by seeing your billboard somewhere in town.
FOLLOW-UP INFORMATION (optional)
The Follow-Up Information section allows you to enter notes about the tenant, set a date and time for following up with the tenant, or close the lead.
You have two options for following up with a tenant: (1) Contact or (2) Make Appointment.
- Choosing Contact will allow you to set up a reminder to call or email the tenant at a given date and time. On the date you choose, your task list will be populated with the follow-up task.
- Choosing Make Appointment will allow you to select a date and time for the tenant to visit the facility. On the date you choose, your task list will be populated with the follow-up task.
If you do not schedule a follow-up activity, Edge will automatically schedule a reminder for you for the next day.
Selecting Close Lead will cancel and remove the lead from the Leads tab. Closing the lead does not remove the person or any of the information you gathered about them from your Edge account. It simply doesn't schedule any tasks associated with that person renting a unit. If they were to return to your facility at a later date, all of the information you had previously gathered would populate in any new lead generated for them when you begin the +Tenant process and type their name into the name entry field.
SAVE LEAD
At this point, you can save the information you've gathered as a lead by clicking the Save Lead button in the lower right corner of the screen. Saving the lead will not mark any unit assigned in the Rental Information section as reserved or occupied. That unit will still show as vacant and will be available to rent to another person. But it will allow you to keep track of this person who is interested in renting from you and help you follow up with them, and eventually convert them to a tenant if they choose to rent a unit from you.

To create a reservation, follow the above steps and continue to the Rental Information section.
Once a unit has been assigned and a desired move-in date has been selected, the Reserve button in the lower right corner of the page will be activated. You can click it to reserve the selected unit for this tenant. Taking this action removes the unit from the available inventory and prevents anyone else from renting it.

If you have a Reservation Fee setup, the Reserve button will display Reserve and Pay instead. Clicking it will take you to the payment screen where you can process the payment for the reservation fee or waive the reservation fee. Once you've either taken payment or waived the reservation fee, then the unit will be reserved.

To move a tenant in, follow the same steps as making a reservation.
If Future Move-Ins are enabled at your facility, you can select a future date based on your settings.
📖 Learn more about moving a tenant in with a Future Move in Date.
Once a unit has been assigned and an appropriate move-in date is selected, the Move-In button in the lower right corner of the page will be activated. You can click on it to move on to the next step in the move-in process.

Move-in
After clicking the Move-In button, you are brought to the tenant details screen. Here you can complete the following information:
- Tenant contact information (address, city, state and postal code are required)
- Account Type (Personal or Business)
- If Personal is chosen, you'll have the option of selecting an Account Category. Account Categories include Standard, Military, Student, Senior, and Other.
- If Business is chosen, you can select Commercial or Other as an Account Category. A field will be revealed to enter the Business Name as well.
- Driver's license and access vehicle information (optional - you can require this info to be gathered by adjusting your Corporate Required Fields settings)
- Access Vehicles are the vehicles tenants use to drive into the facility. Only one Access Vehicle may be entered per tenant and the data is maintained in the tenant's profile. Use [[tenant.vehicle_description]], [[tenant.vehicle_license_plate_number]], [[tenant.vehicle_make]], and [[tenant.vehicle_vin]] to populate the access vehicle data into documents.
- Stored vehicles (optional - you can require this information to be gathered in your Corporate Tenant Settings)
- Stored Vehicles are vehicles that are parked inside the storage unit or stored on the facility's property. The data is maintained in the rentals part of the tenant profile and associated with the unit ledger. Use [[ledger.motor_vehicles_table]] to populate the stored vehicle data into documents.
- Lien holder information
- Alternate contact information (optional)
- Choose the move-in date
- Select the invoicing period. You'll find this next to the move-in date.
- Assign a unique gate access code (required if you have gate integration setup)
- Set invoice receipt preferences and exemption statuses
- Add insurance or services (optional)
- Add military information if Account Type is Personal and Category is Military
- Add a promotion or rate modification
Click Next to move on to the Review step.
If the Account Type selected is Personal and Category is Military, you'll have the option to enter a variety of information related to the tenant's military service. Information from these fields can be included on move in documents when filled in during the move in process. By default, these fields are optional, but you can choose to require them in your Corporate software settings under Required Fields.

Review
The charges accumulated during the last few steps will be listed on the Review screen. Here you can click +Add Month's Rent if the tenant would like to prepay for additional months. You may also click Add Merchandise if the tenant is buying a box, lock or other item, or Add to apply a one-time discount directly to the line item. If you have any fees that are set up to be required at move-in (such as a security deposit or admin fee), those fees will also be listed here. To waive those fees, click the X to the left of the fee item.
If the tenant would like to enroll in autopay, check the box next to Enroll this cardholder/account holder in autopay in the bottom left corner of your screen and choose a day in the service period that you'd like their payment to be processed.
Click Next to move on to the next step.
Documents
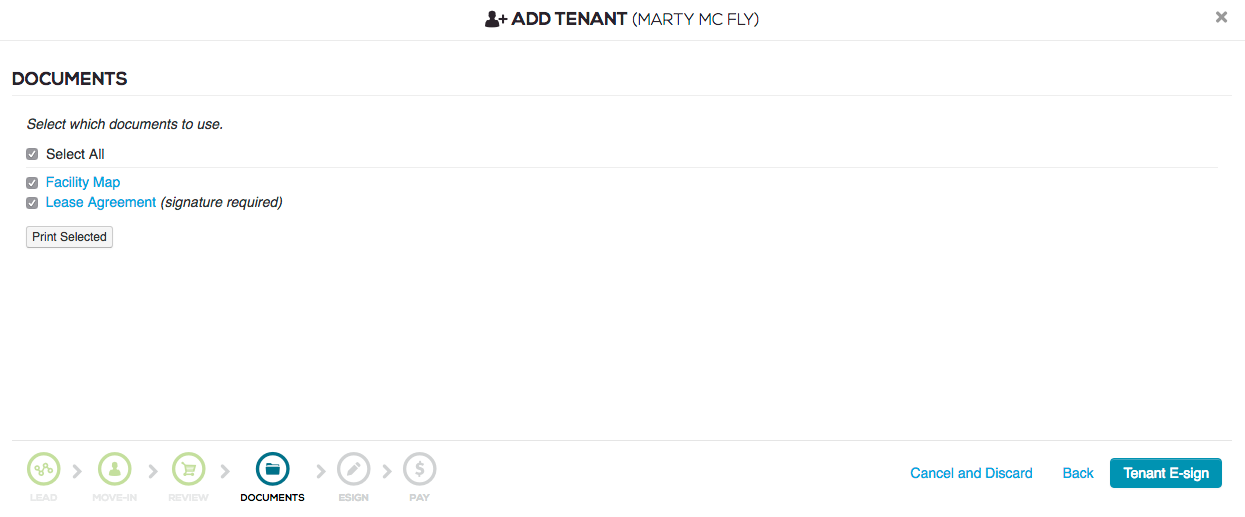
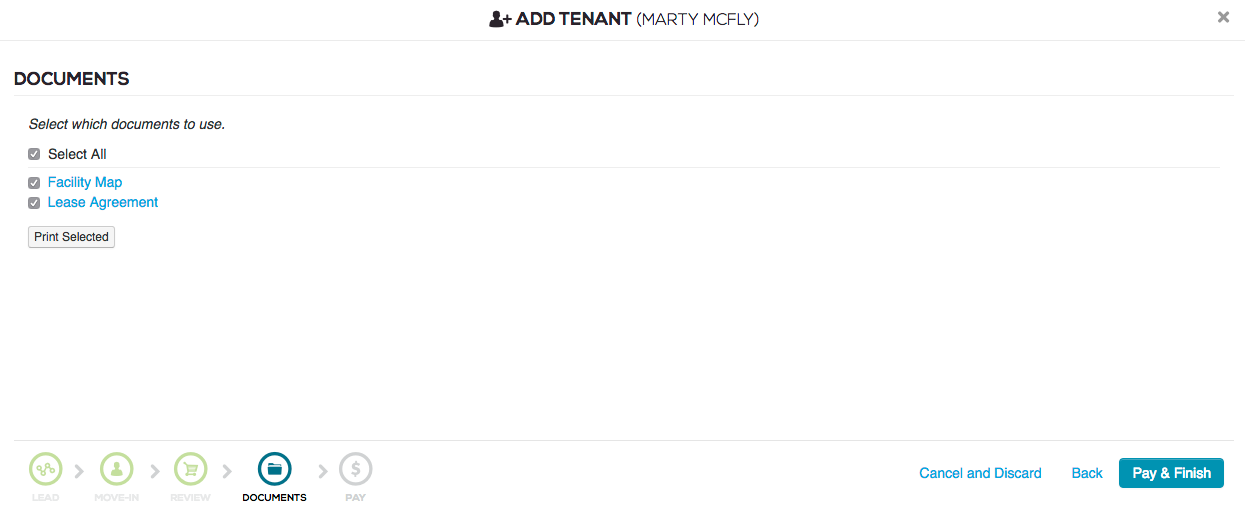
Links to any documents associated with the move-in process will be listed here. All documents are selected by default and will be attached to the tenant's record upon completion of the move-in. You can print the documents now or at the completion of the move-in process.
Sign later
Depending on your settings, you may have the option to send the lease documents to the tenant and for them to sign later. If the setting to Require lease signature during move-in has been enabled in your Corporate Tenant Settings, the tenant will be required to sign their lease now to complete the move-in and will not have the option to sign their lease later.
E-sign
If your document is set up with e-sign, the signature required notation will be listed next to that document's name, and you will see a Tenant E-Sign button that will take you through the process. You can learn more about e-sign on our help site.

If you do not have e-sign activated, you can move on to the final step by selecting Pay & Finish in the bottom right of your screen. If you do have e-sign activated, you can capture signatures at this point in the process by selecting Tenant E-sign and following the steps to collect signatures.

Pay
The final step is the payment screen. Here, the default payment amount is the full amount due. If the tenant doesn't have the ability to pay in full at this time, you have two options:
1. You can edit the Payment Amount to a lesser amount
2. You can click the Pay Later button.
If you are accepting payment of any amount, select the payment type, complete any required fields and click the Pay button.
Success!
The tenant has now moved into the unit! The Success screen will allow you to print or email a receipt if a payment was made. If no payment was made, you will have the option to send an invoice. You also have the opportunity to email or print any documents associated with the move-in as well as upload any scanned file or image you'd like to associate with the tenant.
To rent multiple units to a tenant, click the Add Another Unit button in the lower right corner to move the same tenant into an additional unit.
