Retail items are products your facility sells to tenants or walk-in customers as a one-time transaction. Examples of retail items that many facilities sell include disc locks, boxes, packing materials, and refreshments.
Your software can help you keep track of your retail inventory and pricing for any item you sell at your facility. Through your Corporate Retail items settings, you can update your retail inventory and pricing across all your facilities in just a few steps, making retail management for large companies easier and less time-consuming.
Corporate and Facility-Level Retail Settings
Your Corporate-level Retail Items settings are located under the Billing heading within your Corporate Software Settings. From your Retail items settings, you can add new retail items, make price adjustments, adjust quantities, and make batch updates to multiple facilities at once.
To make changes to Corporate-level Retail items settings, you’ll need the Manage Retail Items permission added to your role.
Your Retail items settings page has three tabs:
Setup Retail: From here, you can add and edit retail items.
Facilities: This tab allows you to add retail items you've previously set up to facilities at your company. You can also see what retail items each facility already carries.
Adjust Quantity: From here, you can add or subtract items from your inventory for one facility or multiple facilities.
In your settings, you can make edits to just one facility at a time or to multiple facilities in a batch.
📖 Your facility-level Retail items settings also allow you to make edits to your retail items, but only for one facility at a time. You can read more about editing your facility-level Retail items settings on our help site.
Add Retail Items
Adding a retail item in your software from your Corporate settings makes it available to add to any facility at your company.
To add a retail item:
From the Setup retail tab, click Add New Retail Item. A new screen will open.
Enter an item description.
-
Enter a SKU.
A SKU is a product code. SKU stands for stock keeping unit. Not everyone uses SKU or UPC codes—if you don’t, enter a description here that makes it easy to identify the item.
Enter the cost of the item.
Enter the suggested retail (price to the tenant).
(Optional) If you’d like the item to be available for sale during online move-ins via the Rental Center, check the box next to Sell in Rental Center and select a retail category for the item.
Click Save.
Edit or Delete Retail Items
Once retail items have been added to your software, you can easily make changes to them from the Setup retail tab in your Retail items settings. To edit an existing retail item:
Click Edit next to the right of the retail item you’d like to edit. A new screen will open.
Make your changes. You can change the item's description, SKU, cost, or retail price, or make the item available for sale in the Rental Center. To delete a retail item, click the Delete button in the upper-right corner.
Click Save.
Assigning Retail Items to Facilities
Once you have retail items set up in your Corporate Retail items, you’ll need to assign them to facilities that plan to carry them in stock before you can add them to a tenant's ledger or process sale transactions for them in your software. You can assign retail items to multiple facilities at once or to just one facility.
To assign retail items to facilities:
1. Click on the Facilities tab.
2. Check the boxes next to the facilities to which you’d like to assign retail items.
3. Click Assign Facility Retail.
4. The next screen will show you all retail items that are enabled for your facilities. To add or edit an item, select it from the Retail Item dropdown.
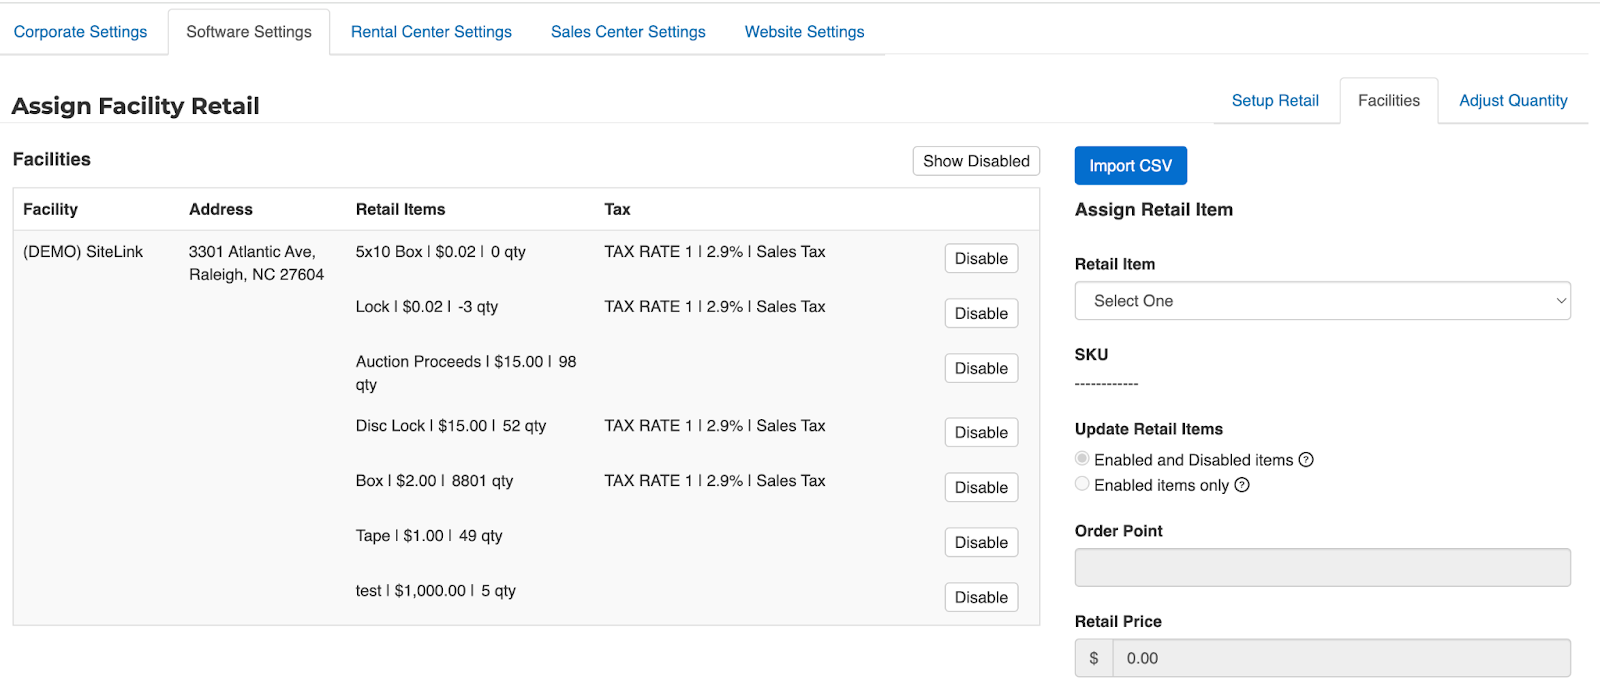
5. Select an option under Update Retail Items.
Enabled and Disabled items: If you select this option, any updates you make to the item will be applied to both Enabled and Disabled items. Disabled items will become enabled.
Enabled items only: If you select this option, any updates you make to the item will be applied to Enabled items only.
6. Enter an Order point: The Order Point is the quantity at which you will need to reorder this item. For example, if you’d like to reorder when there are 10 of an item left, you’d enter 10 here.
7. Enter the desired Retail Price.
8. Select a Tax Type if the item is taxable.
9. Select an Account Code.
10. Click Update Facilities to save your changes.
Keep Track of Retail Inventory
As you sell retail items, your software will keep track of how many remain in inventory. From time to time, you may have to make adjustments to your inventory. To adjust quantities from your Corporate Retail items settings:
Access the Adjust Quantity tab.
Select a retail item from the dropdown at the top of the screen. All facilities that carry that item will be listed.
Enter the quantity of items you’d like to add or remove to inventory for each facility.
The value you enter here does not replace the quantity with a new number. Enter a positive value to add to the quantity. Enter a negative value to subtract from the quantity.
Click Save.
Selling Retail Items During Online Move-ins via the Rental Center
If you offer contactless move-ins via the Rental Center, you don’t have to miss out on retail sales. You can sell your retail items in the Rental Center and place purchased retail items in a customer’s unit, which they can retrieve when they first access their storage unit. This is a great way to ensure your tenants can easily purchase the preferred lock for your facility.
To sell retail items in the Rental Center, you’ll need to check the Sell in Rental Center box when adding or editing individual retail items and choose a category for each retail item. This helps your tenant find the retail items they’re looking for during their online move-in.
To ensure that you don’t sell retail items in the Rental Center that you don’t have on hand, you can define your Corporate Rental Center settings to disable the sale of retail items that you don’t have in inventory. To do so:
Navigate to your Corporate Rental Center settings tab.
Select Online Move-ins.
Select the Yes button next to Disable sale of retail items that do not have sufficient inventory.
Expand the facility dropdown and select the facilities you’d like to apply the setting to.
Click Save. After you've enabled this setting, retail items with fewer than 1 unit in your software's inventory will not appear as available for sale in the Rental Center.